I am very much looking forward to repeating this recipe in the next few weeks.
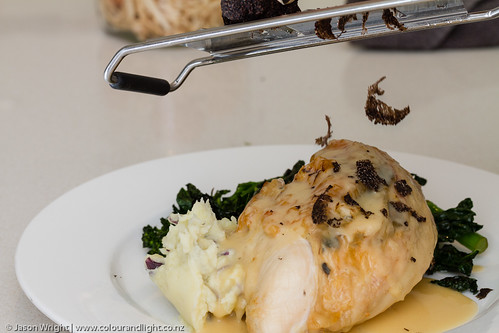
I believe that truffle performs best in simple dishes where the flavour can shine through. There is no point spending money on something that just ends up drowning in other flavours! On plain pasta, in poached eggs, or in a simple meal of roast chicken the truffle gets the attention it deserves!
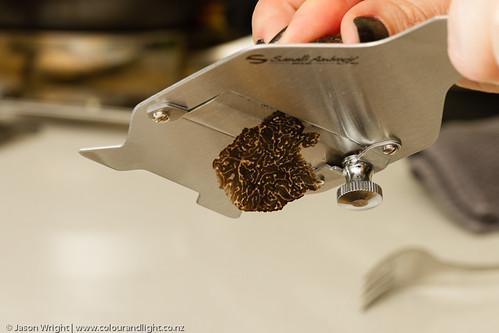
The key to this is very thin slices of truffle - which will be hard to achieve without a truffle slicer. Specialist stores (like Madame Truffles in South Melbourne) sell these, or you can order online. Once you have been sucked into the truffle trap, and know you will be buying these babies every year, it is worth getting your hands on a slicer (if you are still dabbling, I managed just fine with a microplane for a year and a half!)
To truffle your chicken, begin at least 5 hours prior to cooking (even better if you can do this the night before). This will give sufficient time for the truffle flavour to work its way in and make itself at home.
First, prepare your chicken for roasting - I pat dry with paper towels, and remove excess skin/fat with a sharp knife. You can use a whole chicken, or for a smaller crowd use whole breasts with the skin on (if you don't have chicken skin, move on now and find another recipe. This needs chicken skin as the fat holds the truffle flavour).. If using a whole chicken, be aware that the entire bird will have the aroma of truffle - consider this if you plan to reuse leftovers (cold chicken sandwiches will be amazing, but your favourite pasta recipe might need some thought).
Carefully separate the skin from the breast of the chicken, keeping the skin whole if possible (avoid sharp objects and fingernails, which will break through the skin) - I use latex gloves to take the edge off my fingernails, with the added bonus of stopping chicken from working its way under my nails.
Place sliced truffle between the skin and the breast, creating a layer of delicious truffle covering as much surface area as possible. If using a whole bird, repeat with the skin around the thighs.
Cover tightly with plastic wrap, and pop in the fridge until ready to cook (at least 5 hours, preferably overnight. Yes I did mention this earlier but it is important!)
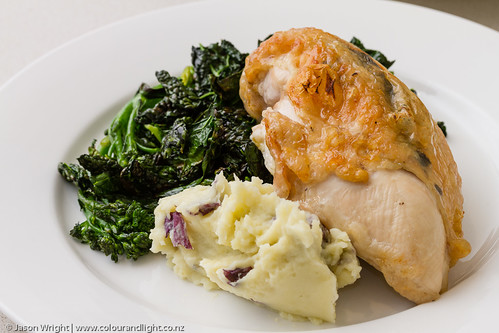
Rub a little softened butter into the skin, and roast your chicken as you normally would.
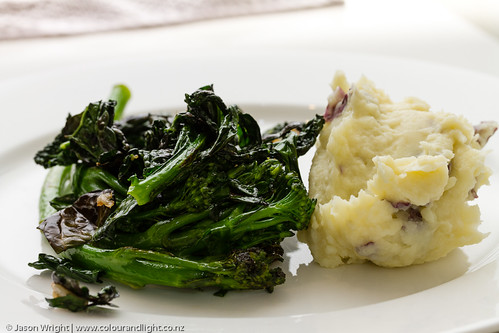
Give a little thought to your side dishes - remember you don't want to upstage the main event. I made roast potatoes (Blue Zarr from Georgie's Harvest) with a little garlic and butter, and stir-fried kale (cavolo nero) with broccolini. Simple, with hints of the earth, these complemented the truffle beautifully.
Also, please consider using any drippings and pan scrapings to make gravy. This was an absolute highlight - the butter and chicken fat carried the truffle flavour, and I could have finished this directly from the jug!
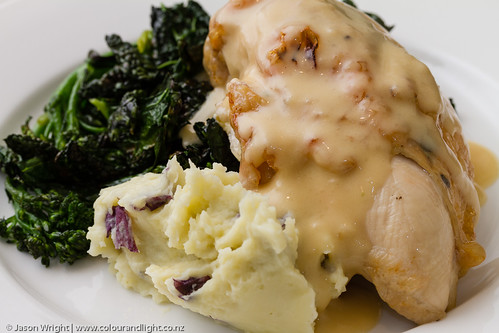
Finish with shaved truffle if you have any left.
Truffles make everything better.
I love risotto made with a medley of mushrooms. One of the first things I fell in love with when we moved to Melbourne was the variety of mushrooms available in stores - and not just at the markets, but in the supermarket! Fresh shiitake, shimeji, enoki, oyster, king oyster, there are so many available! Growing up, the selection was limited to button or swiss brown - or portobello for the BBQ if you were feeling "fancy".
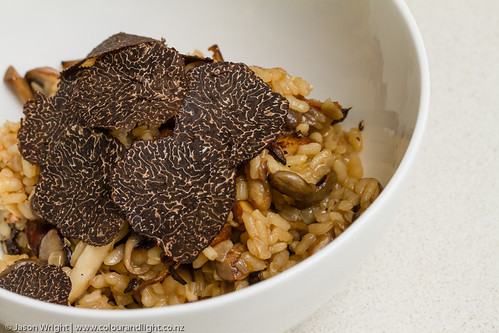
Most often, I brown shimeji, shiitake, and honey browns in butter, and stir through the risotto as it's cooking. I use good quality beef stock (or consomme) and good quality parmesan.
Finish with a generous shaving off truffle immediately before serving.
This is probably my favourite way to use truffles because it costs nothing! Free truffles!
Okay, you still have to buy a truffle, but this is a bonus use that doesn't require you to cut or grate or shave the truffle, unless you are really greedy (like me)...
Take your fresh truffle, and put it in a big enough jar to hold the truffle plus a few (whole) eggs.
This one is an Otway truffle, from Apollo Bay, VIC. These beauties are grown by chef Steve Earl (who cooked for us at the Georgie's Harvest dinner during this year's Melbourne Food & Wine festival - Jason posted a photo summary of this awesome night here).. and we will be back to buy more from Georgie this season!
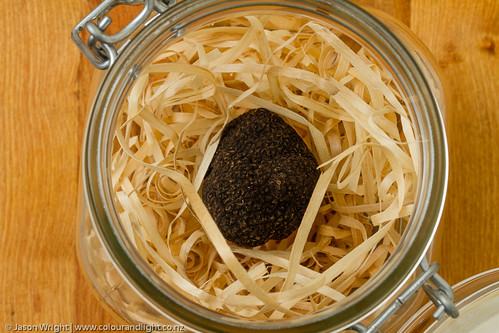
I left the wood straw in the jar, as it smelled like truffles!
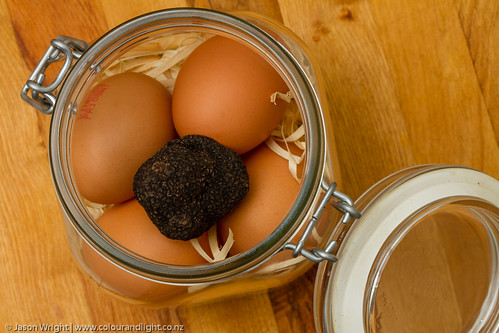
Simply pop the lid on, and store in the fridge overnight - or until you are ready to use the truffle (at least 3 hours).
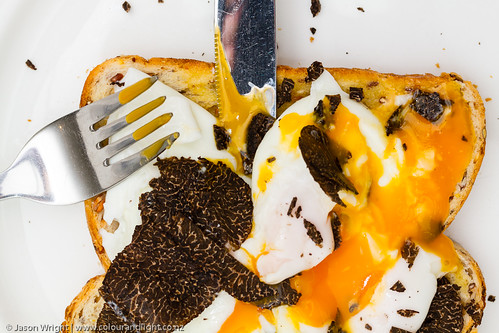
Remove the eggs and use them as you please. They will have been infused with truffle through the shells, and taste amazing. I love them poached on toast with butter and a sprinlle of salt. And I usually can't resist shaving a little extra truffle on top.
My favourite month, and not just because my birthday is in here. Truffle season has officially opened, and I've recently discovered a lot of photos in my archive which I failed to post last year because I was too busy eating!
So, without further delay, I bring you a few long-overdue posts about my favourite funghi... in time for you to source your own and cook!
Panna Cotta is still one of my favourite desserts when the weather is warm.
...which it is not at the moment, but I've found a few old photos and I'm going to share them with you, and dream (and my Northern Hemisphere family can make this!)
The basic rule is to keep your liquid-to-gelatine ratio in line with your favourite panna cotta recipe (or the instructions on your gelatine packet), then you can mess around with what kind of liquid you use. Instead of the traditional milk and cream, it is common to substitute yoghurt - or as I've done here, coconut milk - for the cream. This gives a different flavour, but also drops most of the fat content.
I've learned not to use cocunut cream as the higher fat content means it just sets solid, and is very unappealing (cold coconut cream has a waxy, fatty consistency - nothing like the smooth, soft panna cotta you are after!)
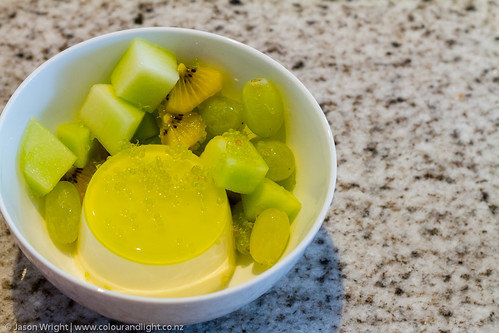
To make it a little fancy, I poured a little lime jelly (lime juice, dissolved gelatin, a touch of sugar, and a half-drop of green colouring) to the tops of the moulds, let set, and then poure the panna cotta mix on top. Serving with green fruit salad (kiwi, melon, and grapes) and Australian finger limes (like tangy caviar) rounded it out.
A hit, I'll make this again.
We visited the garden again yesterday, and Jason grabbed a couple of update photos for me.
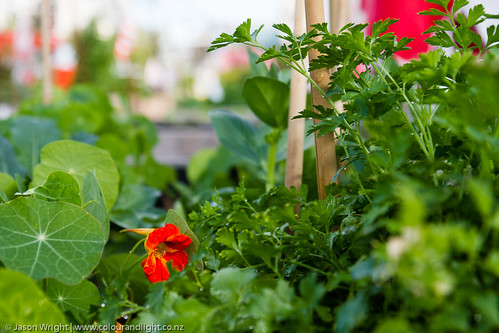
The passionfruit are at the top of the arches. I've kept a few plants from the summer garden for now (a couple of basil plants, and nasturtiums - plus parsley and thyme), but most of this is only a few weeks old. I have broad beans and kale (which I've been dreaming about planting since I first signed up for the garden - so much so that I planted two kinds of kale, russian red and cavolo nero), plus carrots (orange and purple), beets, and spinach:
In other news... See the lonely patch next to my one below?
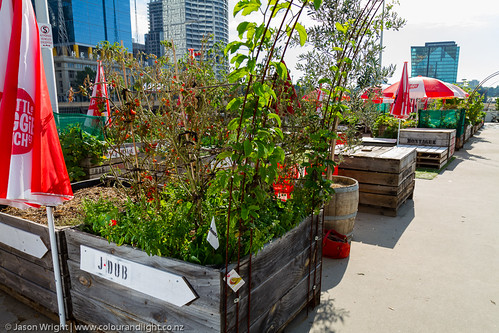
..well it needs a name. If you can think of something more creative than "J-Dub 2" please let me know!
I made the mistake of going for a walk to see what everyone else had planted after mine was done... and I decided I wanted peas, but I didn't have room for them... and now I have room for them, and a few other things too.
Will post some pics once the second garden gets a bit of growth (looks a bit like dirt at the moment, still waiting for the seeds to sprout). Then maybe we'll have a naming ceremony!
I have been a little slack with updates. Since my last two posts, the inside of my Weber Q has gotten very dirty, and my garden has grown, been harvested, and planted again!
While I was away doing other stuff and forgetting to keep you in the loop, this happened:

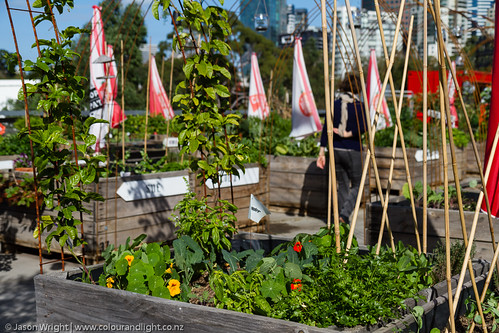
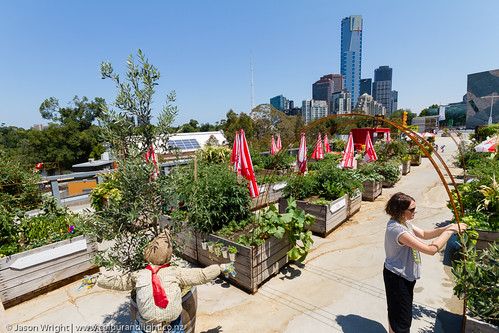
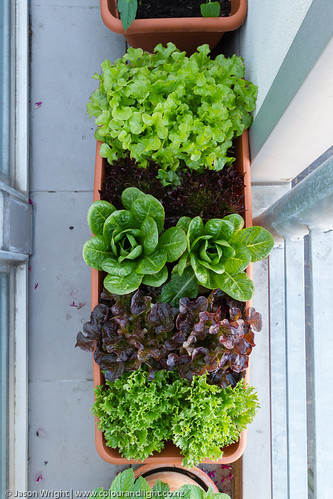
The other gardens in the Pop-up Patch grew too. Our boxes of dirt have evolved to a small urban jungle. Each patch is different, some with flowers amongst the vegetables, some filled with salad greens, others with herbs:
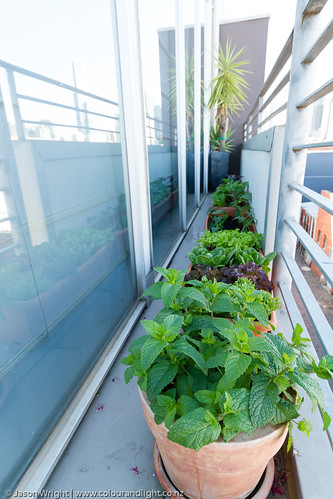
 With a bit more space on our new balcony - and no 28th-floor "breeze" to contend with - I've been able to grow a few things at home to supplement our summer BBQ-and-salad diet. Lots of mint, for mojitos, and salad greens, and a few veggies (beans, eggplant):
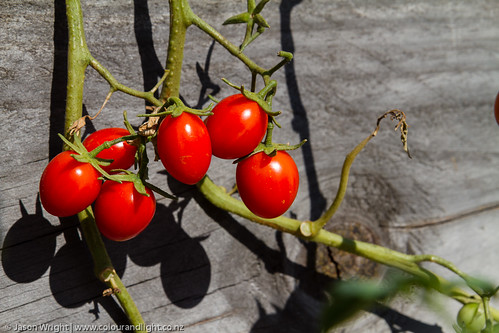
Eventually (with a little staking and tying back) the tomatoes formed a canopy, and provided shade for basil and lettuce underneath. I went home each weekend with a belly full of tacos (the taco truck parked at the garden every Sunday over summer) and bag full of vine ripened cherry tomatoes. All was well.
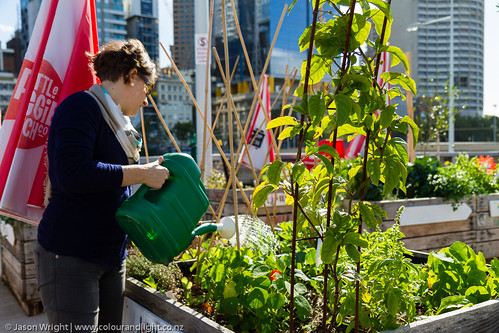
The garden is staffed, and I have a little white flag in my patch which is code for "I surrender, please help me to water this" - so it is well cared for during the week. Just as well, as it was a hot summer!
By early March, the weather was starting to turn. After the last few warm weeks, I gave up and cleared the garden for autumn. The tomatoes had started to look tired, and had finally slowed down in terms of fruit production. I made approximately 40 tonnes of basil pesto (actually, about two litres, then I stopped - but I had enough basil to keep going!) and we had cherry tomato pasta sauce almost every night for a week to finish the last of it.
Next post: what I've planted for autumn!